
From nothing to blinky. Learn how to install the VSCode and PlatformIO tools, write a simple blinky program and upload it to an arduino board. Both of these tools are free and open source and the combination provides a great deal of power and flexibility when developing embedded software for almost any kind of project.
With PlatformIO, you can write code for more than 800 different boards using dozens of different embedded processors as well as the native desktop environment. Embedded software is often written within frameworks Such as Arduino, Mbed or CMSIS. PlatformIO includes these in its list of more than 20 supported frameworks. If you have ever wanted to switch from one processor to another or from one framework to another, you will soon have discovered that getting and setting up the necessary tools can mean a lot of hard work. Even when they are set up, there is the challenge of learning how to use them.
PlatformIO takes care of nearly all of the hard work by installing everything that is needed automatically.
Install Visual Studio Code
Visit https://code.visualstudio.com/ where you will find a download link for your operating system

Download the VSCode software and run it to install VSCode to your system. The first time you run VSCode, you should see this:
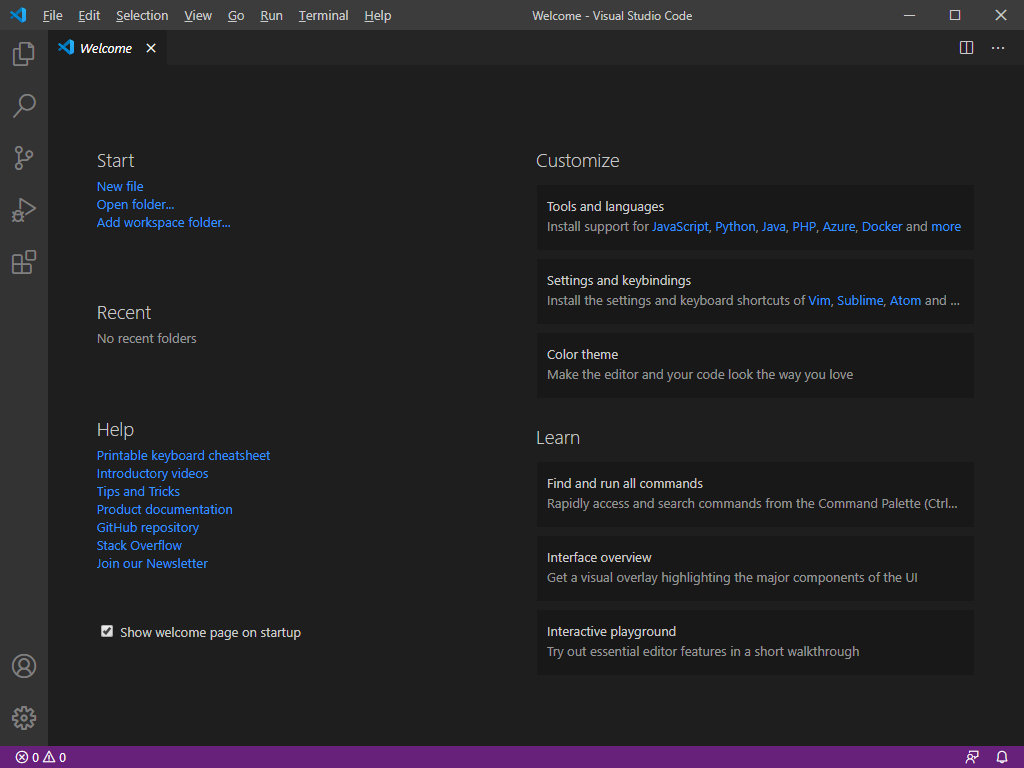
Before you can o much except edit files, you will need to extend VSCode with some extra components.
Install the PlatformIO Extension
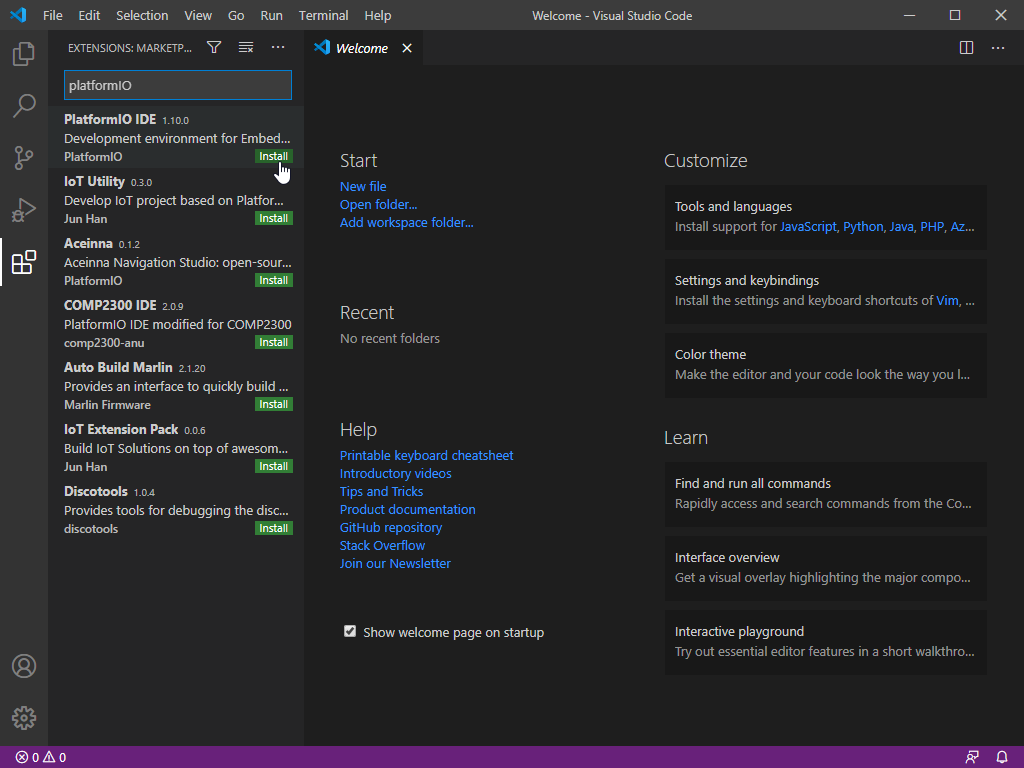
On the VSCode window, you will see the Extensions tool icon at the left that looks like this: ![]()
Click that to open the Extensions window. There are a lot of them. Type <mark class="kt-highlight">platformio</mark> into the box and then click the <mark class="kt-highlight">install</mark> button for the PlatformIO extension.
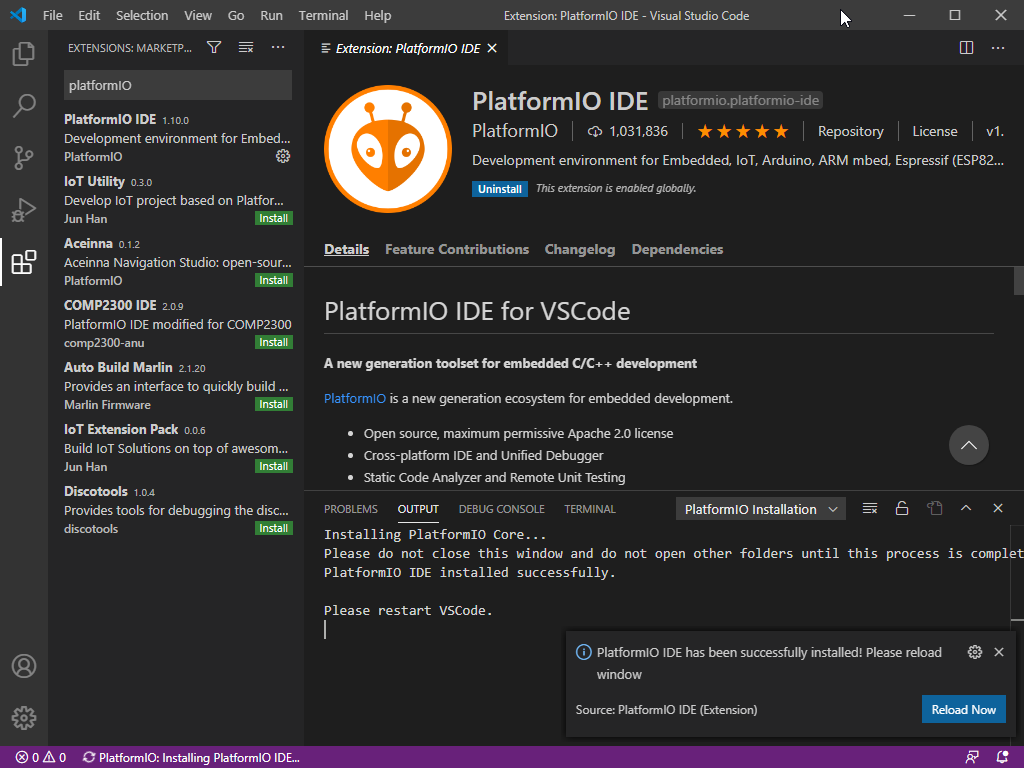
While the extension is installing, there will be a message in the bottom of the window asking you to wait while the installation proceeds. Read the message carefully and only move on when the installation has completely finished. This can take several minutes depending on your internet connection speed. Restart VSCode when it is all done:
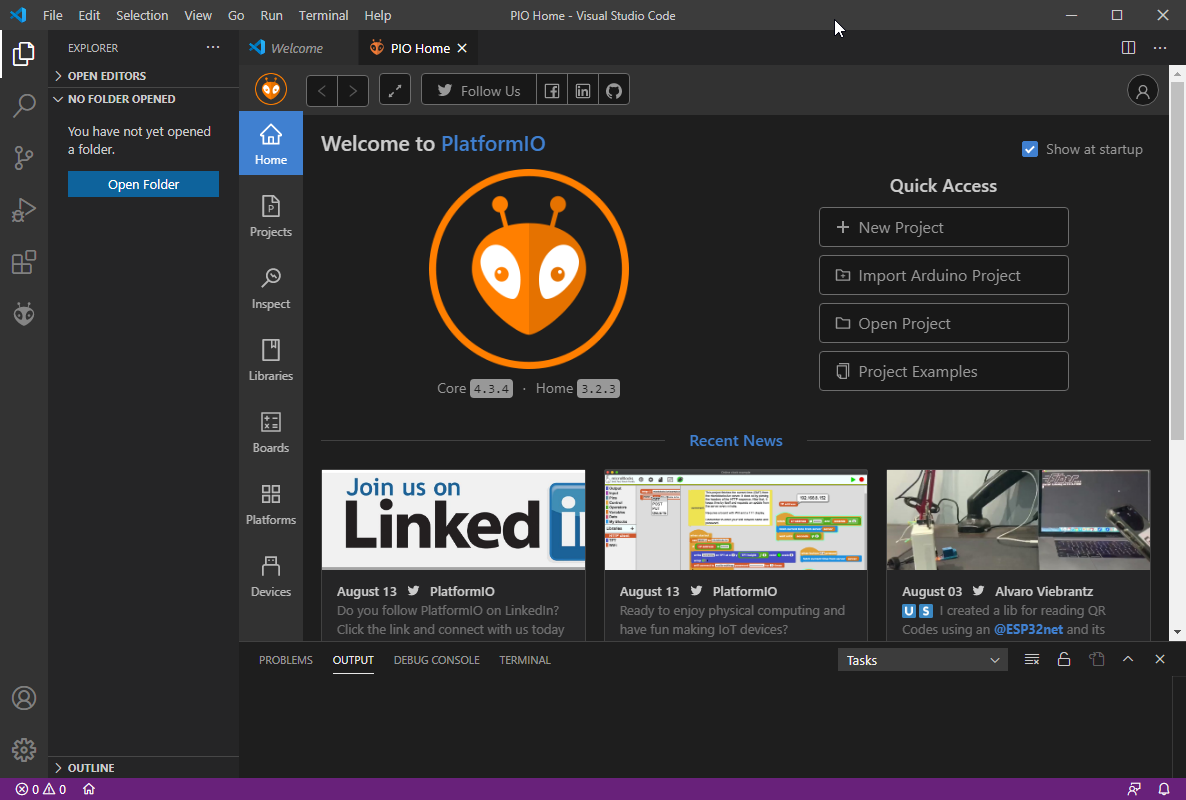
After restarting there will be a a short while everything initialises and you should be presented with the PlatformIO Welcome screen. The left-side toolbar now has a new PlatformIO icon. You can click that at any time to see the welcome screen again.
Configure Arduino Support
A small caution. PlatformIO (PIO) is a powerful tool covering a huge range of boards, platforms and frameworks. Some of these need quite large downloads you have to wait for them to be installed. Be patient. Each download normally only happens once. After that, all you need is on your local computer.
Now that you have PlatformIO installed for VsCode, the next step is to install support for your Arduino board. The main Arduino platform for common boards like the Arduino uno, nano and micro all use the Atmel AVR processor so that is a good place to start.
From the PlatformIO home screen, select <mark class="kt-highlight">platforms</mark> and then <mark class="kt-highlight">Embedded</mark>.

Scroll down and you will see a section called <mark class="kt-highlight">Atmel AVR</mark>. Click the link and, on the next page, click <mark class="kt-highlight">Install</mark>. After some minutes., a dialog will pop up to tell you it has completed.
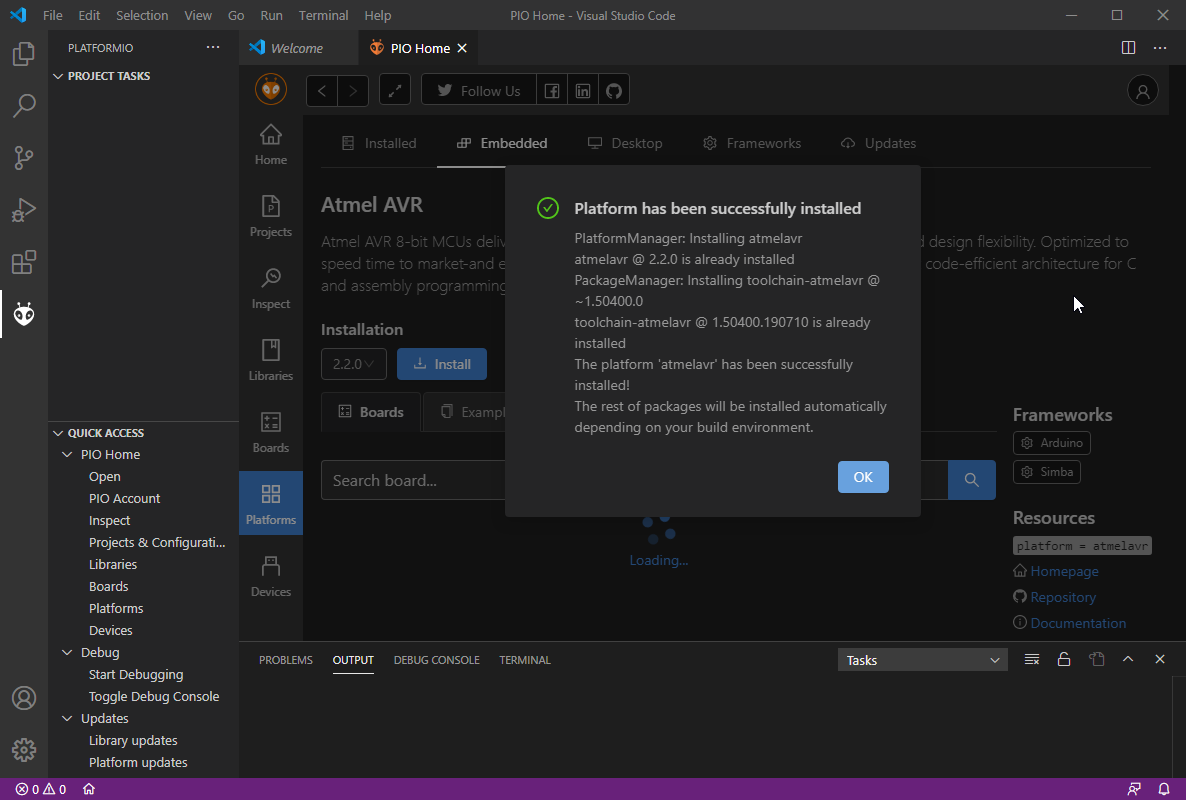
When you close the success message, it may look as if nothing has changed. Select one of the other tools and then re-select Platforms and you should be able to see sections for Boards, Examples and Packages.
Create A Blinky Project
With the basic installed, it is time to create a simple project and test that everything is working. In the traditional manner, you will create a project that just blinks the LED on your Arduino board. This example will use an Arduino nano since that is what is on the bench in front of me but you can use an Arduino Uno, micro or any other Atmel AVR based board.
Go back to the PIO home page and select New Project from the Quick Access list.

In the Project Wizard that appears, type a name for the project and select your target board. Here it is a blinky project and I am using the Arduino Nano 328. (Mine is a clone with the old bootloader). The board list will appear quite large. Just type in the name of your board and the list will reduce to show more specific options. In this case, PlatformIO selects the Arduino Framework automatically. Other boards have other options.
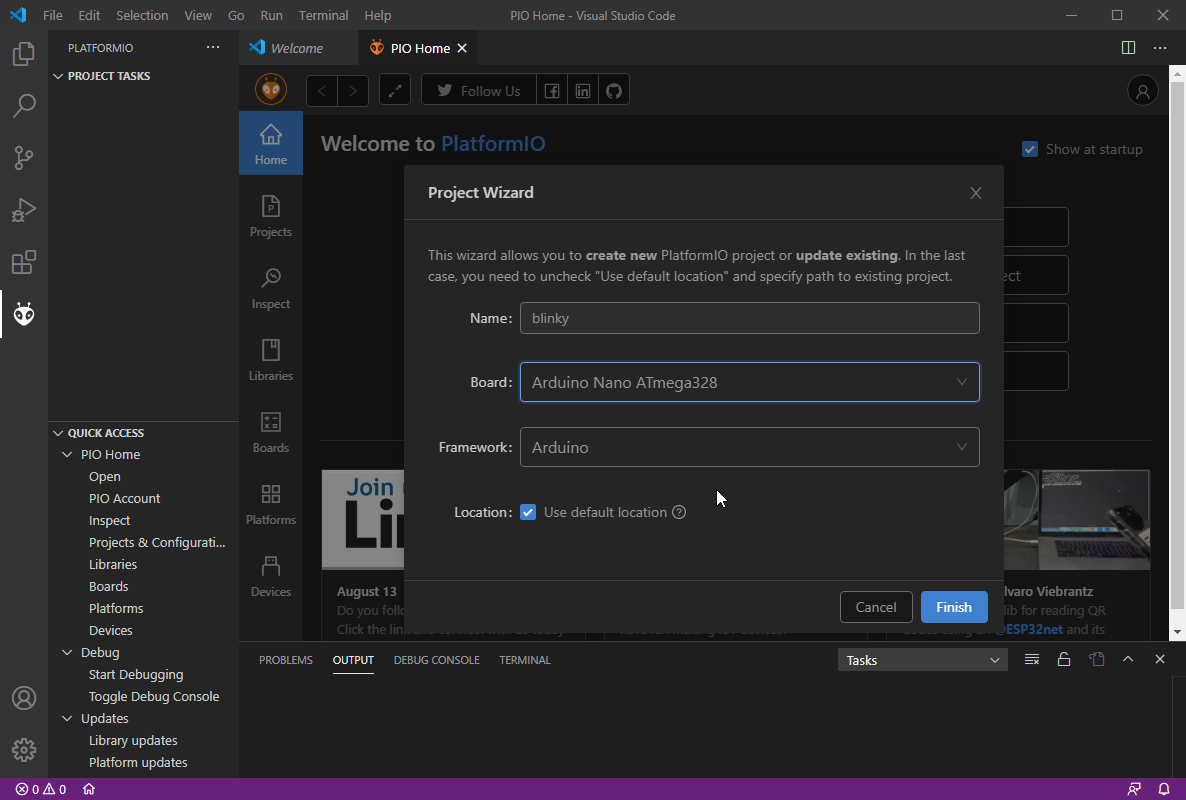
Leave the default location box ticked to have the project created in your home folder under PlatformIO/Projects. The new project is be created in a folder with the same name as the project. It is possible to have you project created in other locations. If that is what you want then untick the box and the dialogue will expand to allow you to choose a new home.
You have to wait some more while PlatformIO downloads all the components needed to create the program. When it is finished you will be returned to the PIO home screen but, on the left of the window, you will see that the Explorer icon is highlighted and the Explorer pane has an outline of your new project. Note that VSCode has a habit of popping up suggestions for further extensions related to what you are doing. Just close these for now and carry on.
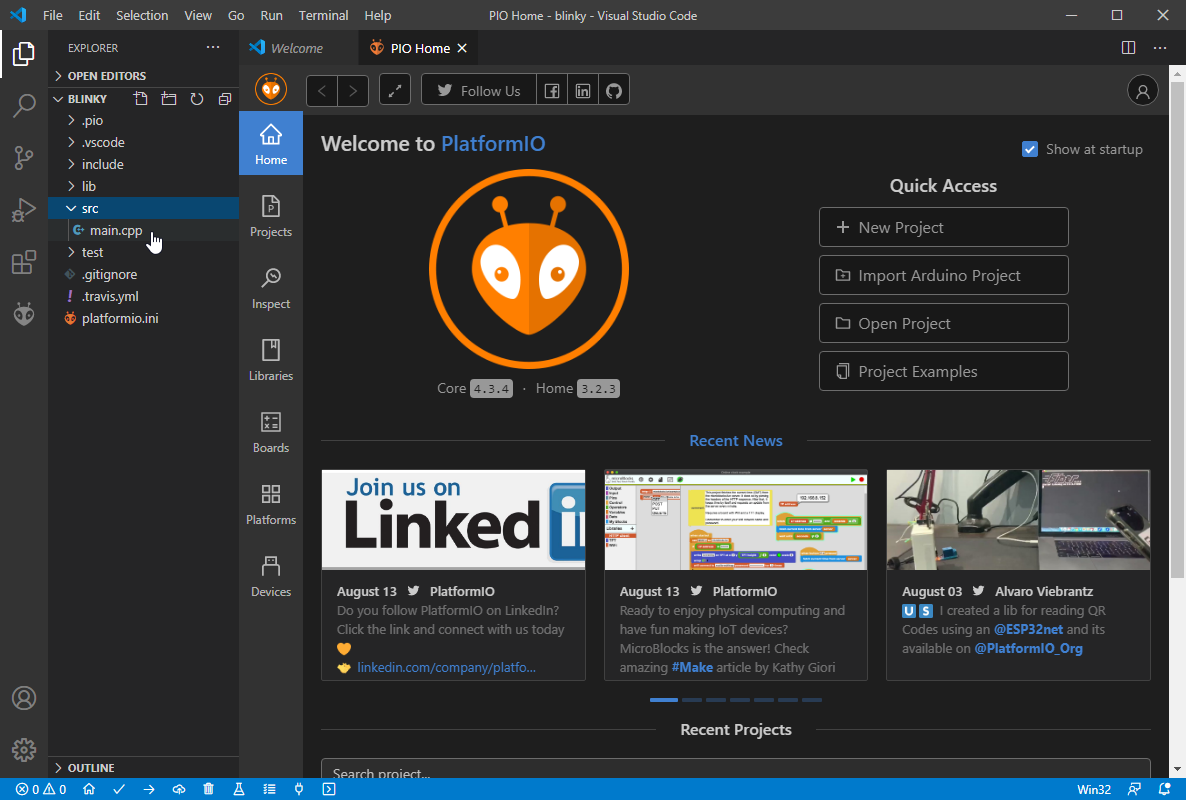
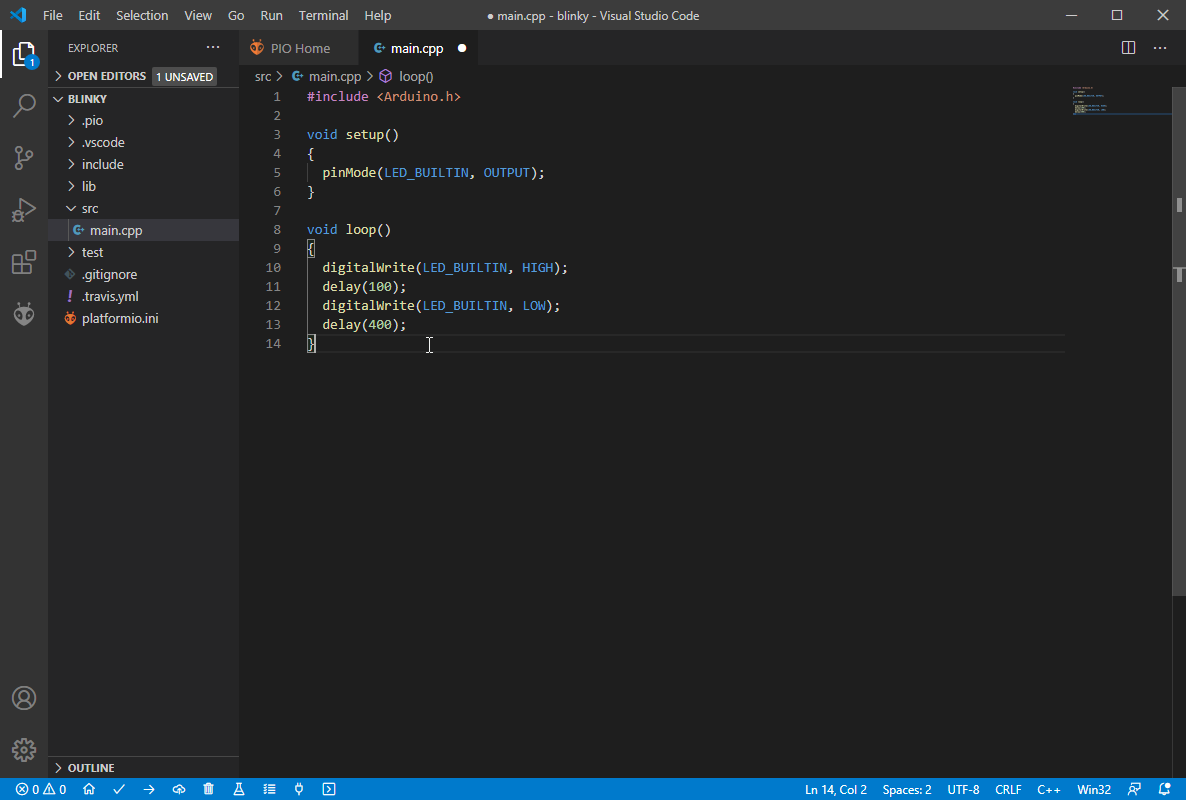
You can close the Welcome and PIO Home tabs now to avoid clutter. In the explorer view, click <mark class="kt-highlight">src</mark> and then <mark class="kt-highlight">main.cpp</mark> to see the source code for your new projects.
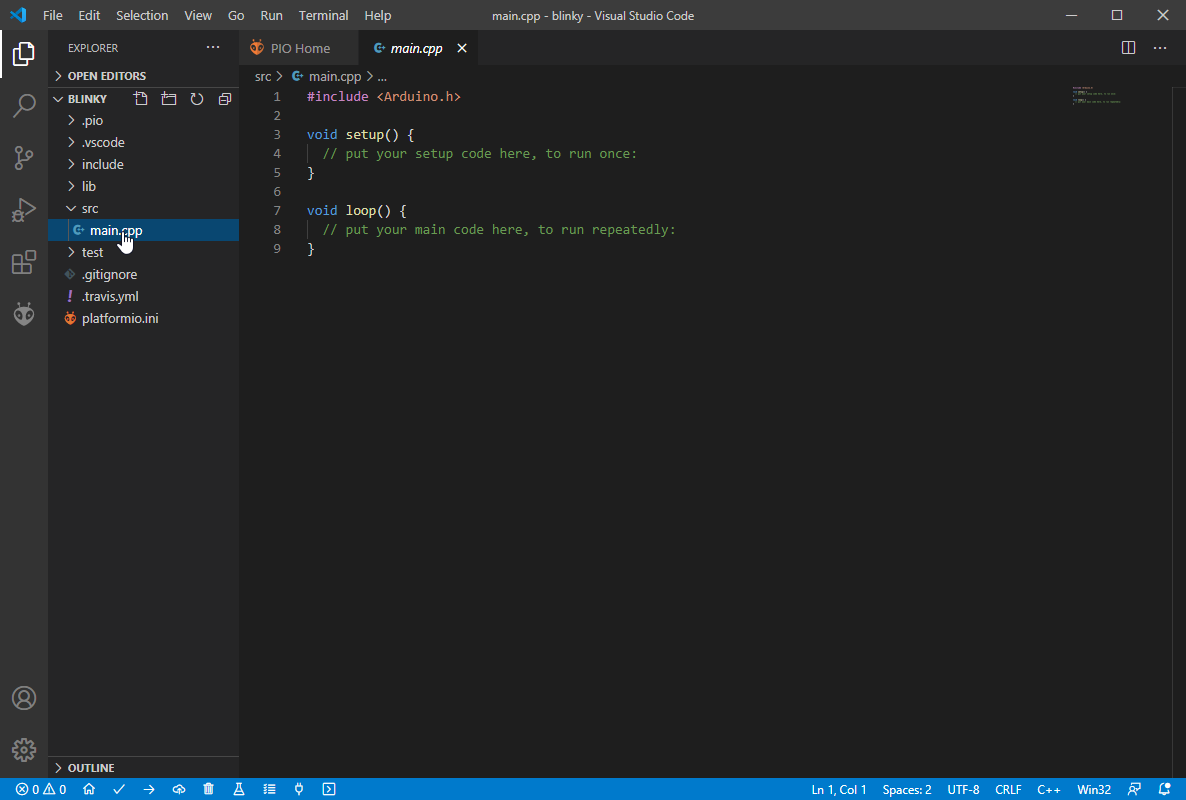
If you have used the Arduino IDE before, you may be looking for a file with the .ino extension. PlatformIO does not normally use that extension though you can choose to if you prefer or if you are using code with both the Arduino IDE and Platform IO. The file is called main.cpp because that is traditional in programming with C++ which is the language actually used by the Arduino framework.
The code in this file should look familiar if you have ever written an Arduino sketch before. After building and uploading this code, execution will first run the code in setup() and then repeatedly call loop() Now you can fill in some blinky action:
Build the project
At the bottom of the window is a blue bar with some icons. Click the tick to build the program. If there are no errors, you will see a summary of the build in the output pane at the bottom of the window:
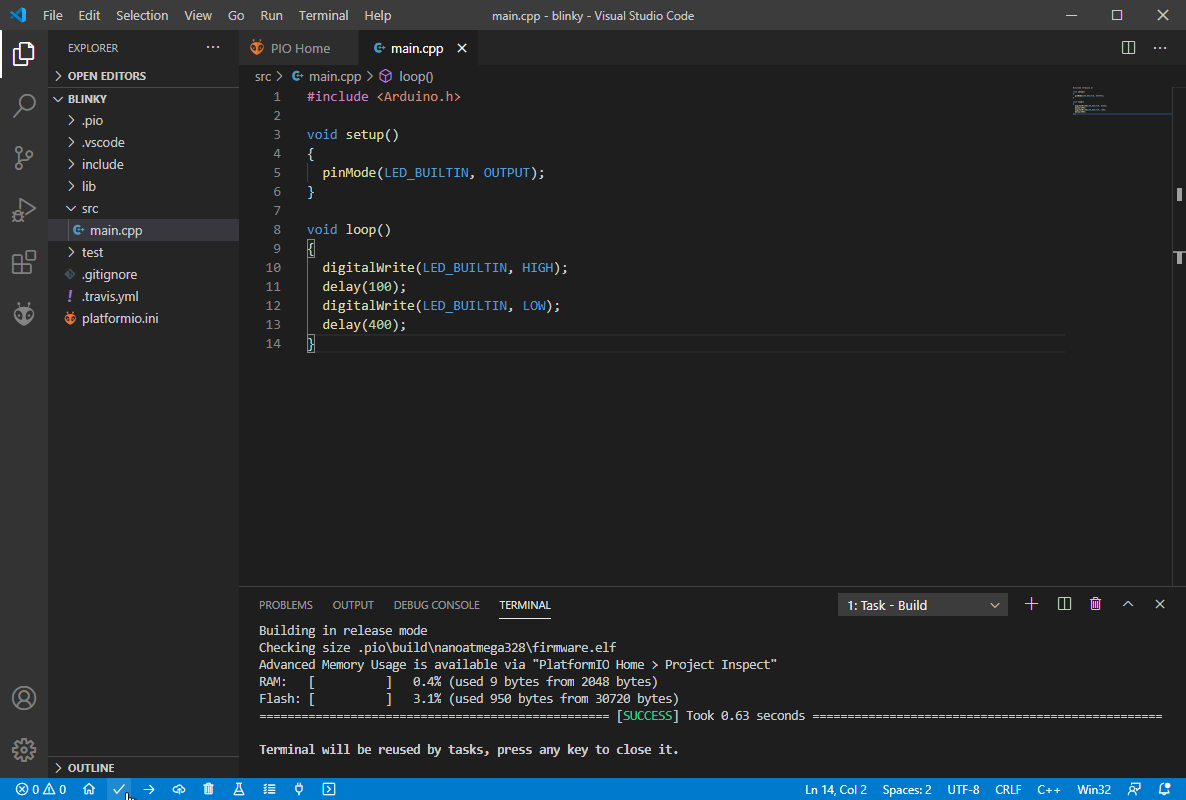
If you get errors, check your typing carefully and try again. Unfortunately, there is not space here to go into all the corrections that may be needed so I will assume it builds successfully. If you have followed all the steps carefully, that should not be a problem.
Program Your Arduino
Before you load a the program into your Arduino board, make sure you have properly connected it to the computer with a USB cable or via a serial converter if you are using a board like the Arduino micro. For the Arduino nano, just connect up a suitable USB cable.
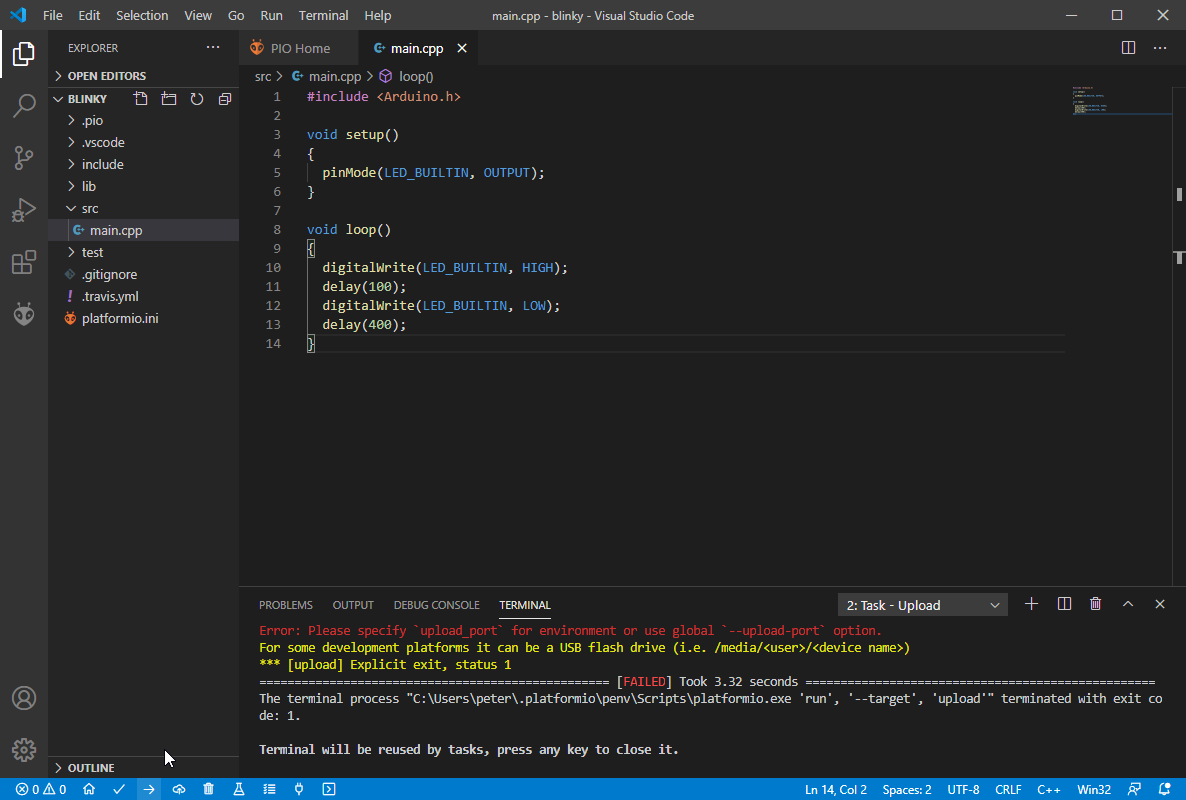
At the bottom of the VSCode window, in the blue toolbar, you will find an arrow icon. This is the upload action. Click this and PlatformIO will try and find your board and upload the code to it. If that is successful, you will see a confirmation in the output pane and your board will be merrily blinking away.

Change the Device Port
Notice that PlatformIO probably knows the port to which you connected the board. Most of the time, it will be able to work it out. Sometimes, that fails and the upload does not succeed. In that case you will see an error message like this:
PlatformIO includes a tool that shows you all the devices connected to your computer. Open the PIO home page and look for the devices toll on the left of the pane. Click that and you will see a list of connected devices and their port assignment. For Windows it might look like this:
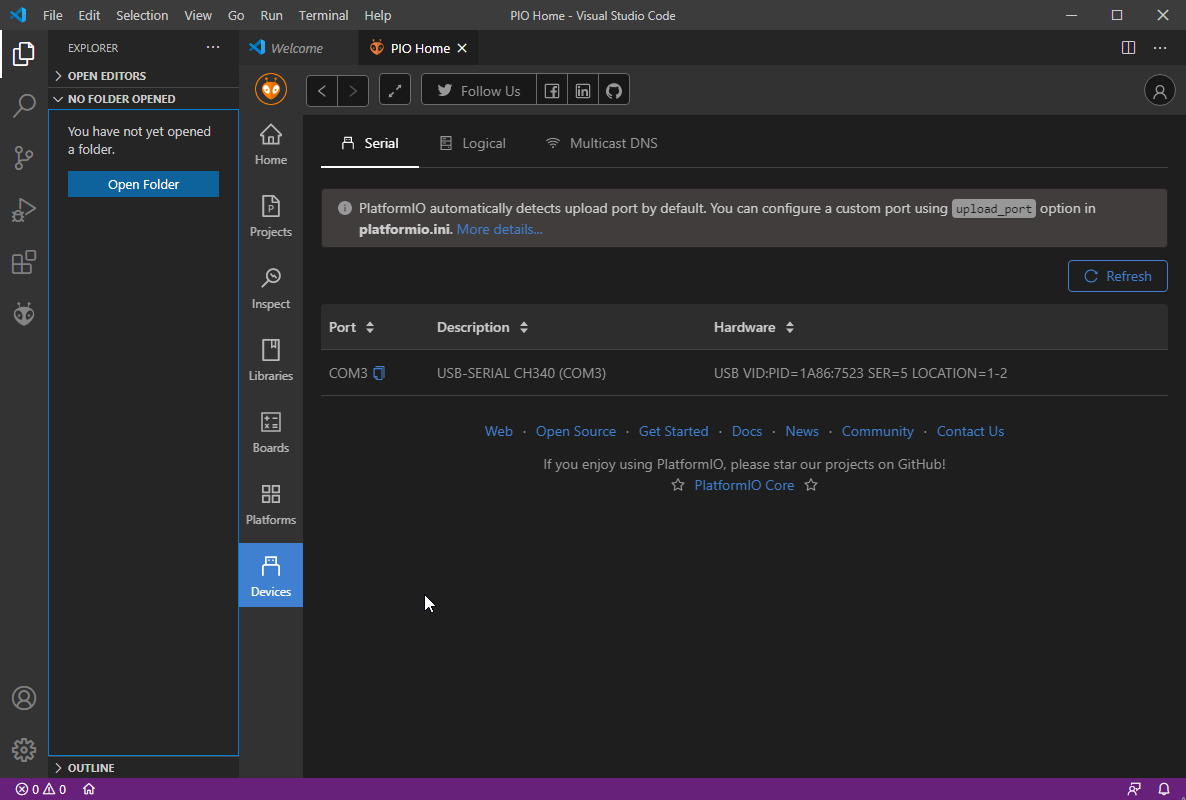
Here you can see there is a single device, connected to COM3. It uses a CH340 Serial bridge. You might have to install a driver for that chip if your operating system does not provide one.
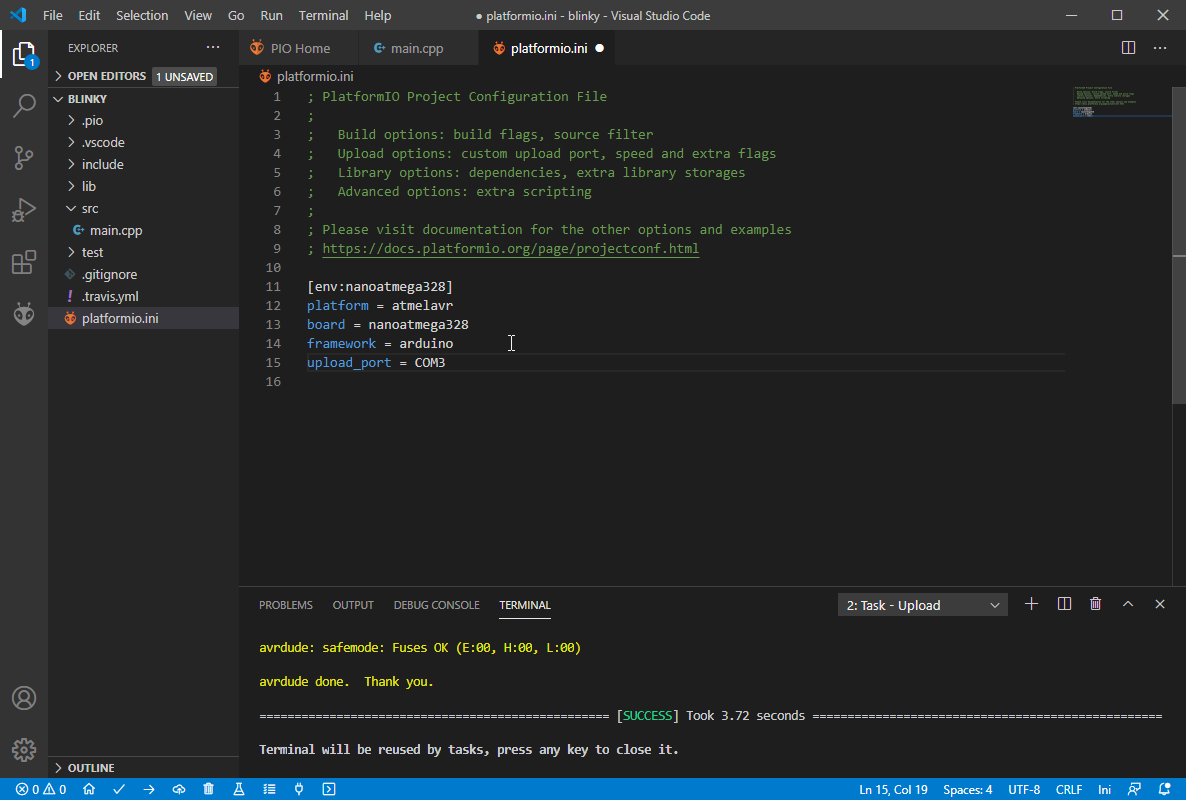
Once you have worked out which is the correct port, you can tell PlatformIO about it in a configuration file called platformio.ini. There is a link in the devices view that gives more information about setting up the port. For the short version, read on.
You will find this file listed in the Explorer. Click the name to open it in the editor and add a line to the end of the file to set the variable upload_port with the name of the port you are connected to. Note that naming the port in this way ‘fixes’ it for this project and if you change the port or the board, you will have to either delete the entry tore-enable auto-detection or edit it again for the new port. Once edited, the platformio.ini file should liik something like this:
If you got this far, congratulations. You now have your VSCode and PlatformIO development system all set up and ready for programming Atmel AVR based Arduino boards.
Further reading
You can find out more at these places